The second step in getting your new account setup for success is to set up your default marketing settings. We'll start with just a few of the basics to get you going.
Where to find your Default Account Settings
If you're a Business Account: First go to your "Default Link Settings" in your Account Settings. This can be accessed here: https://console.feature.fm/account/link-settings
If you're an Artist Account: First go to your "Artist Settings" by clicking the icon that looks like a gear next to your artist name
1. Add your Facebook Retargeting Pixel
2. Add your Google Ads Retargeting Pixel
3. Add a custom sub-domain
4. Add at least 1 localization territory
1. Add your Facebook Retargeting Pixel
2. Add your Google Ads Retargeting Pixel
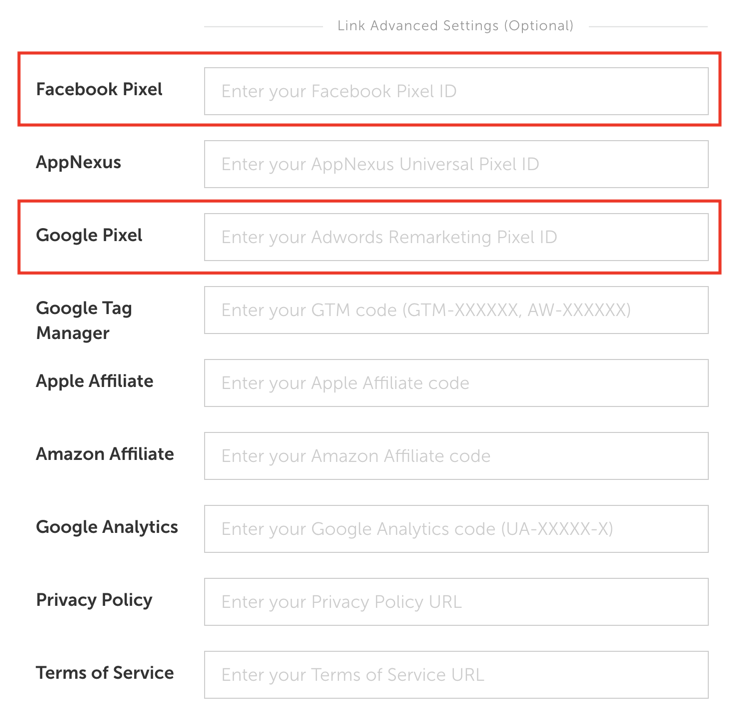
Entering your retargeting pixels will allow you to target ads to fans who have engaged with your Feature.fm landing pages in Facebook Ads. & Google Ads.
- Find the section in your account's default link settings called "Link Advanced Settings"
- Get your retargeting pixels from your Facebook Business Manager and Google Ad Account (Where to find them)
- Enter your Facebook Ads & Google Ads Retargeting Pixels in the right fields.
3. Add a custom sub-domain
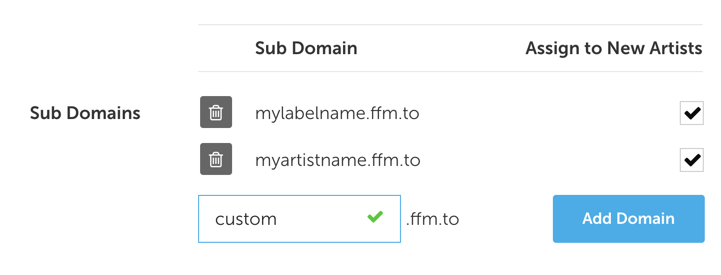
Using custom sub-domains allows you to add your own branding to your ffm.to URLs. For example, you can add your artist name, album name, label name or other custom branding before "ffm.to" such as https://higherground.ffm.to/MMXX
- Find the section called "Sub Domains" in your account's default link settings.
- Enter any sub-domain you want to use in your account
- If it's available, you'll see a green check mark and you can add your new domain
4. Add 1 country to your localization settings
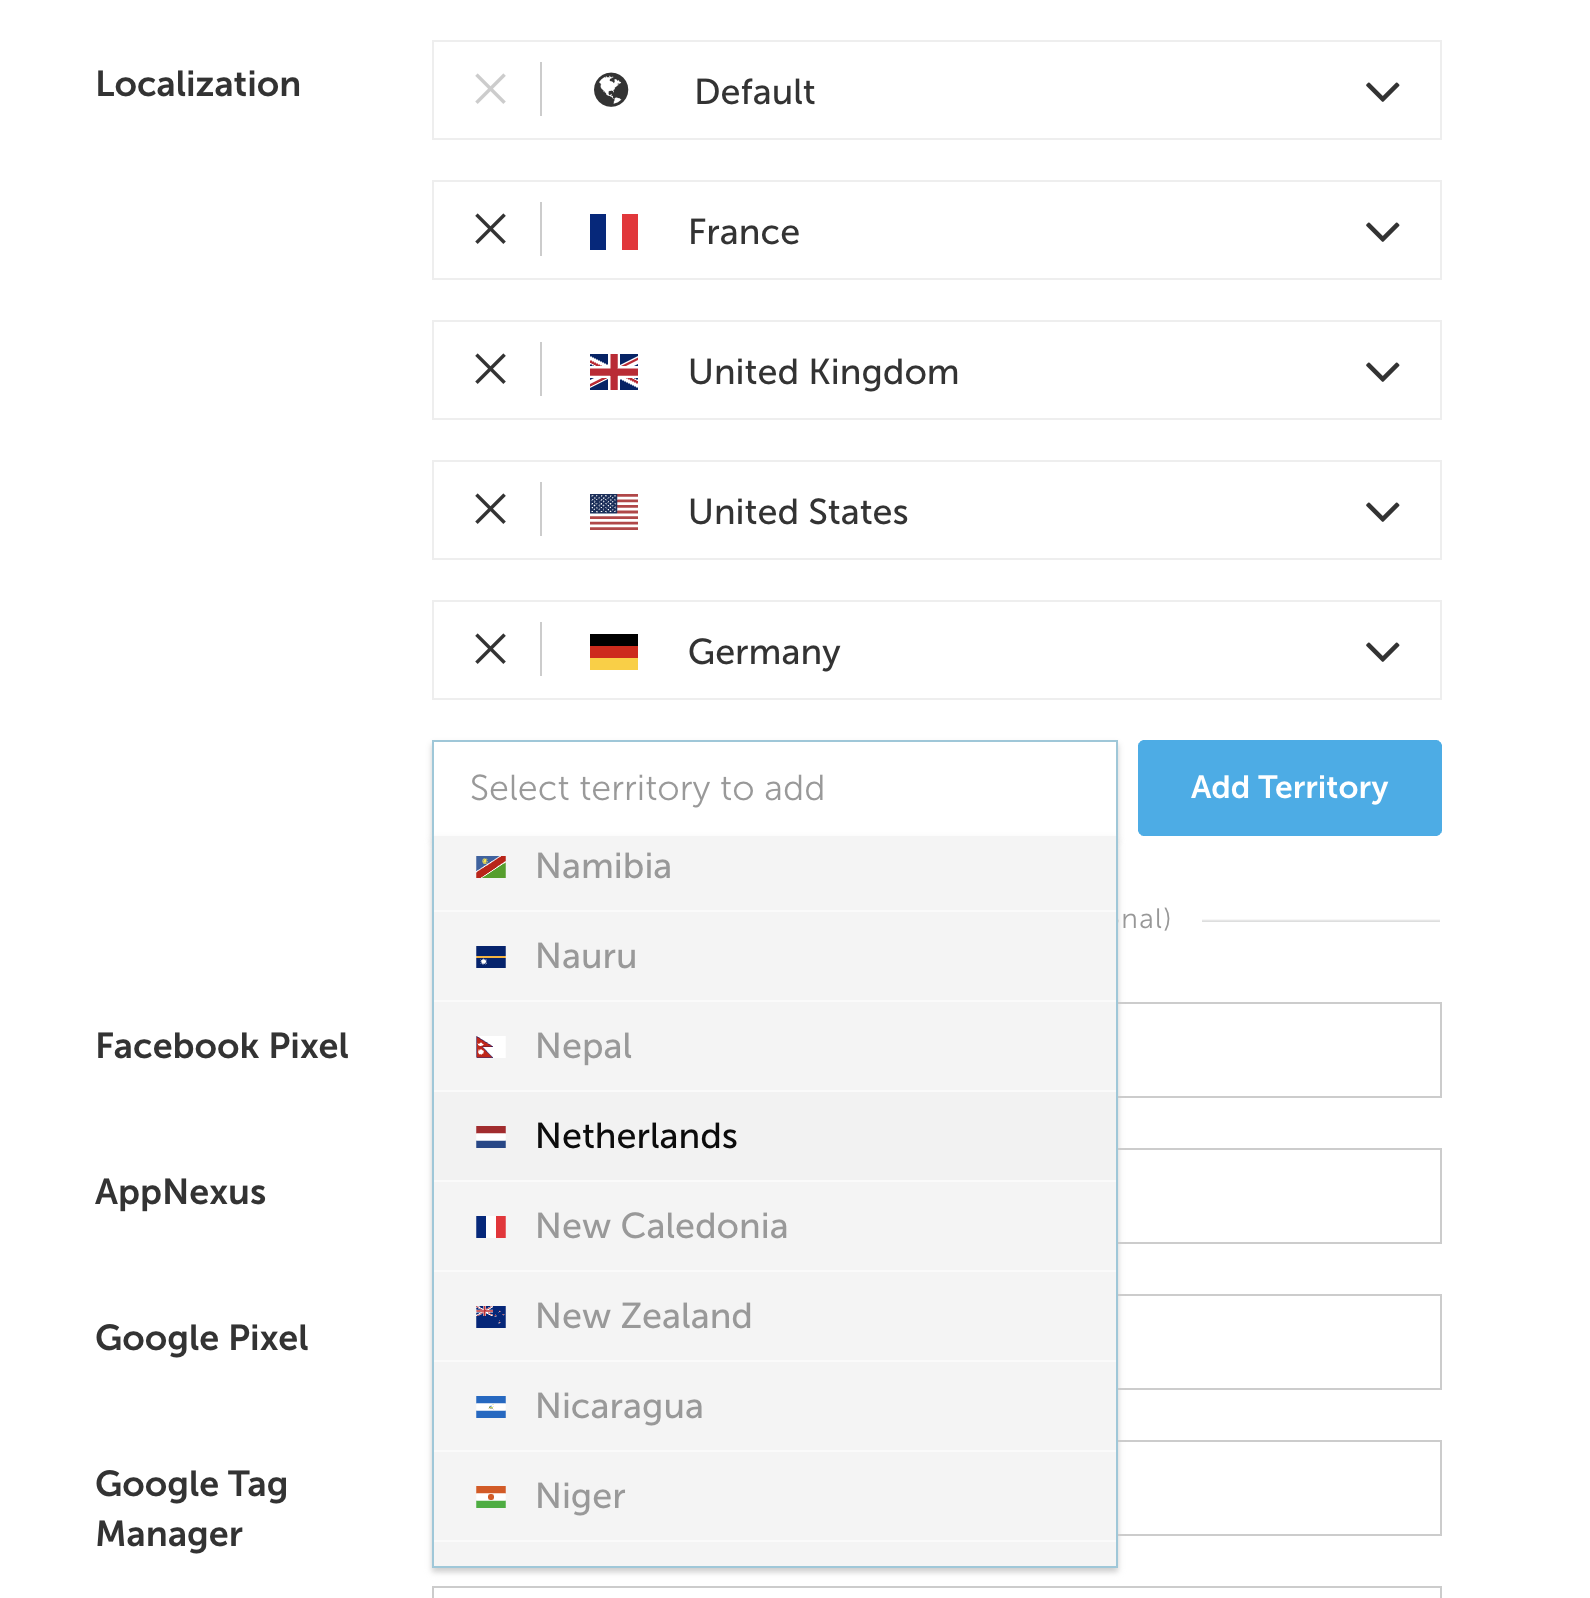
"Localization" settings allow you to set different stores and store orders for fans who click your links from different countries. For example, if a fan clicks from France, you might want Deezer to be the first store, but if a fan clicks from the US, you might want Spotify or Apple Music to be the first store.
Let's start with adding just 1 country to your "Localization" settings.
- Find the section called "Localization"
- Search for or find any country of your choice from the drop down and click "Add Territory"
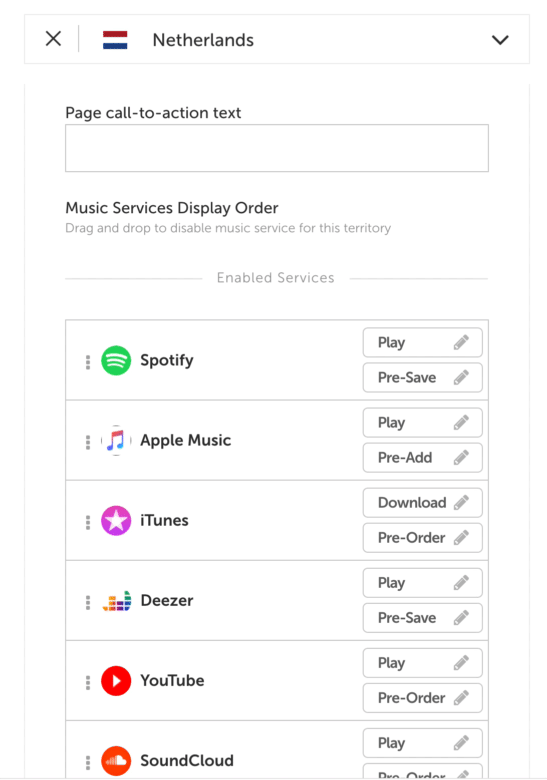
- Once you add the territory, you can drag and drop the store order for that territory if you wish
Now just click "Save" and you're ready to move on to Step 3.